Soy Joy

I recently came upon a recipe on making homemade soy milk. As I have turned to a “eating unprocessed foods” diet, this was perfect! All you need are dry soybeans and water. And it goes a lil somethin’ like this…

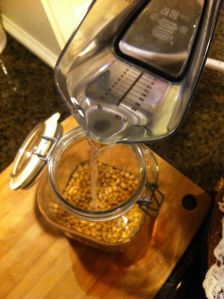
Measure out one cup of dried soybeans and 5 cups of water. Find yourself a nice big jar like this one and let the beans soak overnight in the water.

Let it pour, let it pour, let it pour…

It should look like this:

After you soak those beanies, strain the water out in a colander and separate the soybeans in half. Put one half in a blender/food processor along with 2 cups of HOT water. Blend those babies until smooth and pour into a large cooking pot. Repeat with the other half. Bring the purée to a boil. You should see foam atop the milky substance–

After simmering for 8 minutes, line a large colander with a moistened pressing cloth/sack and place the colander in the mouth of a clean pot. Transfer the soybean purée into the pressing cloth/sack and twist the cloth closed. Press the cloth sack with a potato masher. Show em’ who’s boss. When you have extracted as much as you can, open the cloth and stir the remaining purée briefly. Add 1 1/2 cups of hot water into the cloth and repeat the pressing.

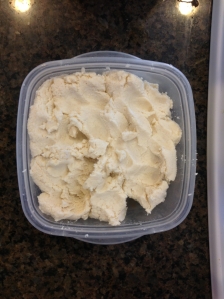
Enjoy your milk! Warning: this will taste EXTREMELY different from the store bought kind. I recommend sweetening it with raw honey or organic agave nectar. Your end results should look like the image above. OH and the one below.

That my friend is called “okara,” the soybean pulp from soy milk. Don’t discard it! It can be used in cooking and is delicious. It spoils quickly though, so keep it in the refrigerator and use it within 1 to 2 days of making your soymilk.

The Oaks at Oaji

I have never endured such an intense health experience until I visited the Oaks at Oaji. Located in the cute little town of Oaji, this spa focusses on eating healthy and exercising 24/7 to become that physically and mentally fit person you want to be. The spa features a variety of classes that change every day, from high intensity cardio to relaxing Qi Gong. You are on a 1200 calorie diet yet they supply you with low cal snacks to help get you through the day. And if you don’t feel like exercising, there is a great relaxation area by the pool 🙂

The food was probably my FAVORITE part about the Oaks. I applaud the chefs for making a 75 calorie muffin that tastes delicious! And it’s not easy. Right when I returned home, I tried their blueberry muffin recipe…let’s just say it could have passed at rabbit food. But I’m still trying! Anyways, I bought their cookbook and was thinking, why not do the Oaks challenge? A recipe everyday and then blog about it? I am SO down. I don’t know what I am getting myself into but hopefully it works out…

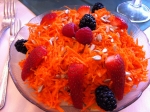
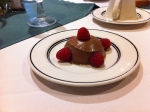
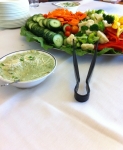
Here are some lovely pictures of the food we ate!

Find the ‘Healthy’ in Unhealthy

When you eat out, what is your go to menu item? The salad or the cheesy garlic bread? For me, I would go with the salad…but the whole time I’m chewing those leafy greens, I would be craving that cheesy, butter-soaked garlic bread. So how do you make your favorite comfort food a healthy choice? I will tell you.

Remove the “UN-necessaries”

If I were ordering an omelet, I would say, “Well, what could I remove from this to make it a healthier, more nutritious meal?” Look at the menu description and point out the “UN-necessaries.” Cheese? Don’t need it. Toast? Empty calories. Meat? Go veg for a day. Eggs? Well obviously it’s an omelet, but you could always make those eggs, egg WHITES. Add some veggies? Pile it on! Now look at your omelet and marvel at how much healthier it is. And you can apply this technique to any meal!

Dressing on the side please!

You never know what a restaurant puts in their dressings. Or if they even make them. Order the dressing on the side so you are only ingesting as much dressing as you want instead of eating unnecessary dressing. I’m pretty sure you can eat a salad with half the dressing they give you.

Read your options carefully!

All in all, you just have to go through a menu with a fine-tooth comb. There will be options that seem delicious but think how it will make you feel after you eat them? Too-full. Heavy. Kinda gross. Take those choice out. You obviously want to indulge sometimes; it is very healthy, just indulge intelligently.

Sweet & Sour Veggies

This slideshow requires JavaScript.

I was in the weirdest mood the other day. I had the most spontaneous desire to make dinner. Dinner in my house is a pretty big deal; all meals are home-cooked and served at the proper dining hour. Plus, my family loves to eat so you have to make a generous amount of food. Anyways, I came upon this recipe from the vegan cook book “Piece of my Heart” written by Mielle Chenier Cowan Rose and it looked so delish that I just had to go for it. I hope you try making this one at home for your family. Simple, yummy, and flavorful. And it is quite flexible if you want to make your own side dishes or even add your own lil’ flair 🙂 Have fun!

☆ Sweet and Sour Vegetables ☆

Combine in a small bowl to make sauce

1 Tbl miso paste

2 Tbl tamari

2 Tbl rice vinegar

1 ½ Tbl honey

1 Tbl cornstarch

1 Tbl toasted sesame oil

Stir well to dissolve starch and set aside. Note: I slightly tweaked this recipe and used about a tsp. of minced garlic and ginger, and added a ½ tsp. more honey and a few pinches of salt. Gives the sauce a lil’ kick!

Combine in a large pan:

1 Tbl light sesame oil

¼-½ tsp red pepper flakes, to taste

2 lbs mixed vegetables (I used onion, cabbage, carrots, broccoli, & shiitake mushrooms)

Stir fry over medium-high heat for 3-6 minutes until veggies are cooked. Add:

Sauce (above)

Cook 1 minute more, until the veggies are glazed. 

☆ Speckled Rice ☆

In a medium pot:

2 cups water 

Bring water to a boil and then add:

1/2 cup Organic Lake Wild Rice

Cover pot and cook for about 45-50 mins, or when all water is absorbed.

In another medium pot:

2 cups water

Bring water to boil and then add:

1 cup white rice

Cover and cook for about 20 mins.

When both rices are ready, stir both types into a bowl until combined. The wild rice on top of the white should create a speckled effect.

Inspiration

My inspiration for this blog started with a little bit of acne. It was during that lovely pubescent time of 6th and 7th grade when those red unwanted bumps started appearing on my face. Of course, everyone goes through that phase, one pimple here, another one there, but I was the unfortunate one who was diagnosed with straight up acne.  I went to all extremes in the drugstore buying technology like Nuetrogena Wave to washes like the Clean and Clear Blackhead Scrub; nothing worked. I needed to dig a little deeper to help my face to clear up. It wasn’t until the end of 8th grade when I made the discovery of products that changed my face forever: organic skin care. From then on my breakouts became less frequent and I was motivated to research specific ingredients found in facial products. Juice Beauty, MyChelle, SkinCare Organics, Yes! To Tomatoes; these brands (and more) helped me create a more healthy, paraben-free skin care routine and made me aware of the benefits of organic face washes. So when you are going to the drugstore for face wash, think twice about what you are buying. Read the labels, check for parabens, and if it isn’t the product you thought it was, the organic aisle is always open.